Contest of the Month - July Edition!
Sat Jul 11, 2015 12:08 am
Hey guys, it's July! Wow, time goes by quick.
These monthly competitions are a chance for you to demonstrate your creativity and talents while getting a chance to know your fellow members and have a little fun. Each month is going to have a different theme and a different talent – and maybe a surprise or two! But only one member can wear the purple coins and fancy title of CotM Winner! Do you have what it takes?
The basic rules are as follows:
JULY IS A GOOD MONTH FOR THIS COMPETITION! DESCRIPTION (as many paragraphs as necessary) Think I was supposed to delete that part of template, but ok. This month's idea comes from our very own Alarra!
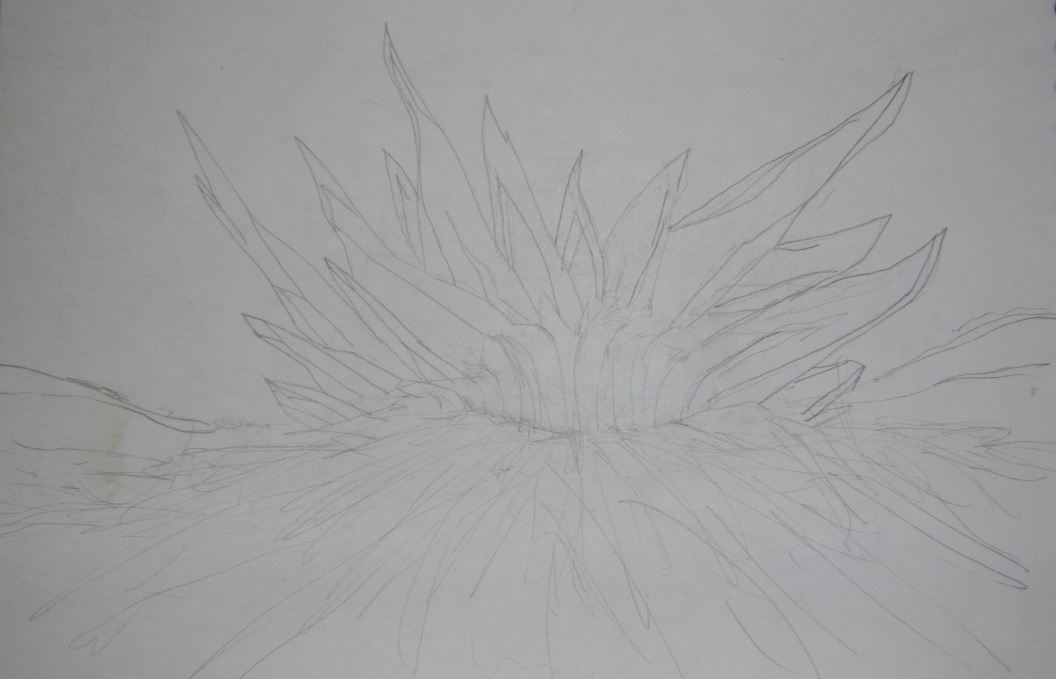
"If you could design a dungeon/cave in the ES series, what would it be like?" Describe or draw the layout, aesthetics, enemies, traps, boss, and so forth.
So yeah, get to it! Design them things up good!
Our schedule for the [MONTH] July event is as follows:
[DATE RANGE]: July 10 - 27: Competition begins! Start planning and send in those submissions!
[DATE RANGE]: July 28-31: Voting period – vote for your favorites!
[DATE]: August 1: Our winner is announced!
Please note that all times are determined by me, Musicman, and therefore will run according to GMT -6/Central Standard Time. (Click here if you’re unsure when, exactly, that is!)
Remember that the CotM is not possible without you, so please participate, contribute, discuss, and vote!
As an aside, if anyone would like to join the street team to help plan and set up the CotM, please send me a PM Until then, have fun and good luck!
(This fun event is hosted by yours truly. If you have any questions, feel free to ask them within this thread or by sending me a PM by selecting the appropriate button below my signature. Have some suggestions on what you'd like to see? Head over to the ideas thread and join in on the discussion!)
Welcome one and all to the Competition of the Month!
These monthly competitions are a chance for you to demonstrate your creativity and talents while getting a chance to know your fellow members and have a little fun. Each month is going to have a different theme and a different talent – and maybe a surprise or two! But only one member can wear the purple coins and fancy title of CotM Winner! Do you have what it takes?
The basic rules are as follows:
Spoiler:
JULY IS A GOOD MONTH FOR THIS COMPETITION! DESCRIPTION (as many paragraphs as necessary) Think I was supposed to delete that part of template, but ok. This month's idea comes from our very own Alarra!
"If you could design a dungeon/cave in the ES series, what would it be like?" Describe or draw the layout, aesthetics, enemies, traps, boss, and so forth.
So yeah, get to it! Design them things up good!
Our schedule for the [MONTH] July event is as follows:
[DATE RANGE]: July 10 - 27: Competition begins! Start planning and send in those submissions!
[DATE RANGE]: July 28-31: Voting period – vote for your favorites!
[DATE]: August 1: Our winner is announced!
Please note that all times are determined by me, Musicman, and therefore will run according to GMT -6/Central Standard Time. (Click here if you’re unsure when, exactly, that is!)
Remember that the CotM is not possible without you, so please participate, contribute, discuss, and vote!
As an aside, if anyone would like to join the street team to help plan and set up the CotM, please send me a PM Until then, have fun and good luck!
(This fun event is hosted by yours truly. If you have any questions, feel free to ask them within this thread or by sending me a PM by selecting the appropriate button below my signature. Have some suggestions on what you'd like to see? Head over to the ideas thread and join in on the discussion!)
Re: Contest of the Month - July Edition!
Sun Jul 12, 2015 7:26 pm
Do sex dungeons count? If so, i may have to disappear for a few weeks to focus on my return as the COTM's Dovah's 2 time champion! If not, i deny that i am working on sex dungeons for TES VI.
Re: Contest of the Month - July Edition!
Sun Jul 12, 2015 9:47 pm
This is a great COTM! Not sure I have enough ideas for it, but I'll certainly try...
Good gods, the first post in the thread and you're lowering the tone already, Dovah?!
You might be able to get away with a sex-themed dungeon if Sanguine's involved...
Thelastdovah wrote:Do sex dungeons count? If so, i may have to disappear for a few weeks to focus on my return as the COTM's Dovah's 2 time champion! If not, i deny that i am working on sex dungeons for TES VI.
Good gods, the first post in the thread and you're lowering the tone already, Dovah?!
You might be able to get away with a sex-themed dungeon if Sanguine's involved...
Re: Contest of the Month - July Edition!
Sun Jul 12, 2015 9:59 pm
Maybe. Also, wouldn't it be a Molag Bal themed Dungeon? I mean, he does seem like the type that is into er.... actually, i better stop this before i end up getting banned.
Will see if i can get my entry done soon!
Will see if i can get my entry done soon!
Re: Contest of the Month - July Edition!
Sun Jul 12, 2015 11:27 pm
Be careful encouraging the madness, Bara! It never turns out good. 
No naughty dungeons Dovah! This is a respectable place.
No naughty dungeons Dovah! This is a respectable place.
Last edited by Aarah on Mon Jul 20, 2015 3:26 pm, edited 1 time in total.
Re: Contest of the Month - July Edition!
Mon Jul 13, 2015 10:28 pm
Spoiler:


Last edited by all_freed on Tue Jul 14, 2015 11:19 pm, edited 2 times in total.
Re: Contest of the Month - July Edition!
Mon Jul 13, 2015 10:57 pm
*folds before she's even started brainstorming*
Re: Contest of the Month - July Edition!
Mon Jul 13, 2015 11:30 pm
Ah, OBLIVION! *stabs self repeatly with Daedric claymore to avoid being forced to admit he has no chance in reclaiming his title as COTM*
Re: Contest of the Month - July Edition!
Tue Jul 14, 2015 11:09 pm
Sorry about that i was just rereading the rules and noticed we gotta hide the whole post. currently trying to do that but it looks like all the hide tags is confusing itself.
p.s. ah ha! i did it
p.s. ah ha! i did it
Last edited by all_freed on Tue Jul 14, 2015 11:17 pm, edited 1 time in total.
Re: Contest of the Month - July Edition!
Tue Jul 14, 2015 11:17 pm
all_freed wrote:Sorry about that i was just rereading the rules and noticed we gotta hide the whole post. currently trying to do that but it looks like all the hide tags is confusing itself.
If you put it in a spoiler tab it works ok.
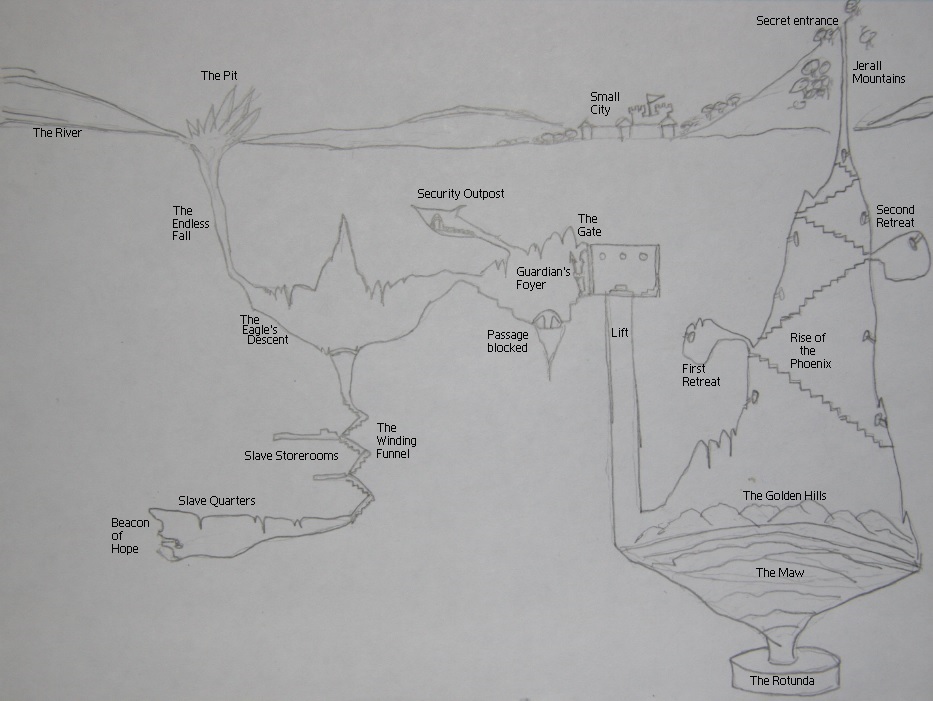
Nice entry, by the way!
Edit: That underground cross-section map is great!
Last edited by Aarah on Tue Jul 14, 2015 11:24 pm, edited 1 time in total.
Re: Contest of the Month - July Edition!
Tue Jul 14, 2015 11:19 pm
Aarah wrote:all_freed wrote:Sorry about that i was just rereading the rules and noticed we gotta hide the whole post. currently trying to do that but it looks like all the hide tags is confusing itself.
If you put all of it in a spoiler tab it works ok.
Nice entry, by the way!
Oh ok, thank you. yeah that's much better
Re: Contest of the Month - July Edition!
Wed Jul 15, 2015 1:13 am
With no drawing skill or anything I'm resorting to writing. But I do hope this comes across pretty well.
This dungeon is in the confines of Oblivion's system if it matters.
The Forlorn Citadel
Wow, that was fun to write.
This dungeon is in the confines of Oblivion's system if it matters.
The Forlorn Citadel
Hidden:
Wow, that was fun to write.
Re: Contest of the Month - July Edition!
Wed Jul 15, 2015 11:19 am
Excellent entries so far! Keep 'em coming!
Re: Contest of the Month - July Edition!
Mon Jul 20, 2015 5:22 am
Aarah wrote:No naughty dungeons Dovah! This is a respectable place.
Wait, really? Is that a rule?
Re: Contest of the Month - July Edition!
Fri Jul 24, 2015 4:16 pm
Four days left to submit an entry!
That is not a rule. TES games are rated M, so as long as you can justify what's in the dungeon with some sort of story, it's fair game. I would ask that if you are going to submit a mature themed dungeon, put a small warning before the hide box.
Deandra wrote:Aarah wrote:No naughty dungeons Dovah! This is a respectable place.
Wait, really? Is that a rule?
That is not a rule. TES games are rated M, so as long as you can justify what's in the dungeon with some sort of story, it's fair game. I would ask that if you are going to submit a mature themed dungeon, put a small warning before the hide box.
Re: Contest of the Month - July Edition!
Sat Jul 25, 2015 12:17 am
In that case, I may have to throw together a last-minute entry!
Re: Contest of the Month - July Edition!
Tue Jul 28, 2015 2:51 am
And... I am not happy with what I've got so far, so I don't think I'll make it this month. I should have started earlier 
Re: Contest of the Month - July Edition!
Tue Jul 28, 2015 8:52 pm
Poll is up! Vote like the purple coins depend on it! Because they do!
Re: Contest of the Month - July Edition!
Mon Aug 03, 2015 11:32 pm
Oh, look! A new CotM winner! Congrats, all_freed!
Re: Contest of the Month - July Edition!
Tue Aug 04, 2015 3:16 am
Well done, all_freed! You won it (even though you didn't go into much detail ). It's a shame that your dungeon won't be turned into a real in-game one, but alternatively, I hope you enjoy the purple coins!
Re: Contest of the Month - July Edition!
Fri Aug 07, 2015 9:07 pm
Ok thank you all. Thanks for the mods. Thank you to Unionhack and thank you to everyone for posting and voting.